How to Use Quillbot for Blogging? - ChatGPT Alternative
ChatGPT goes out of service too often? Need an alternative? Learn how to use QuillBot's innovative features and tools for writing blogs swiftly and effectively.

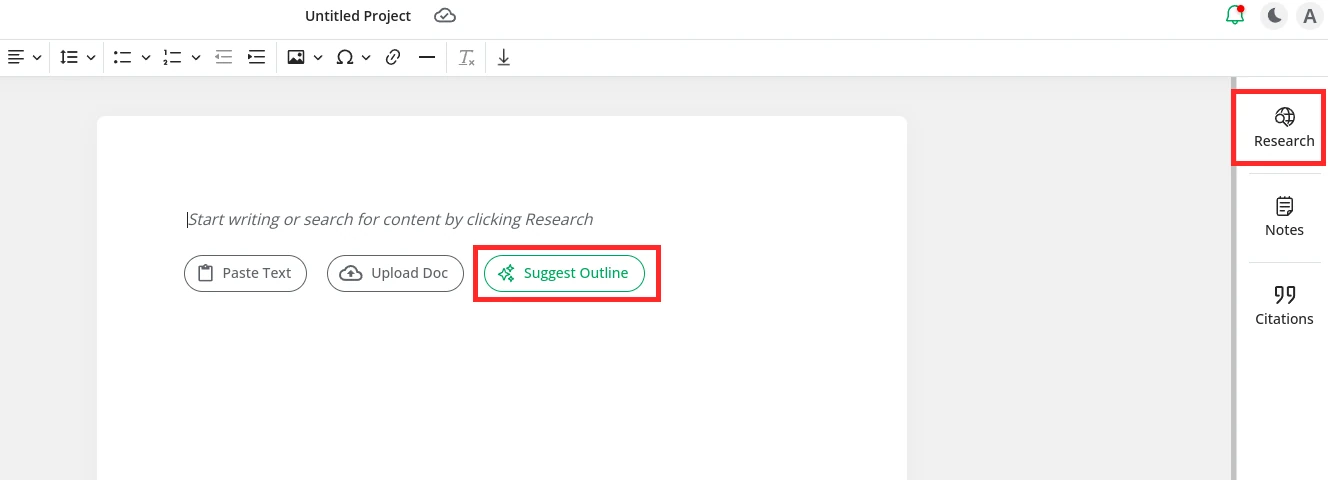
Go to QuillBot Co-Writer and create an account if you don’t have one already. Click on the blank project button to create a new project.
You will see a document editor with lots of features. For starters, you can click on the “Research” option in the right sidebar to do some research on your topic, or you can click on the “Suggest Outline” button.
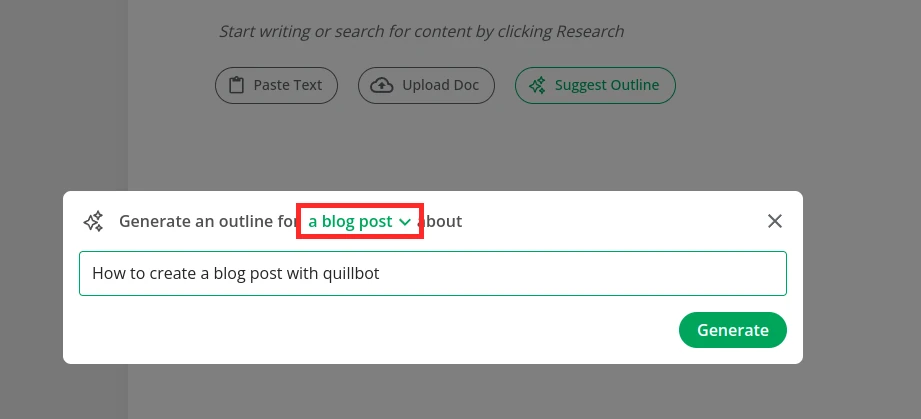
A popup will open; change the type to “a blog post”, enter the blog title you have in mind, and click the “generate button.
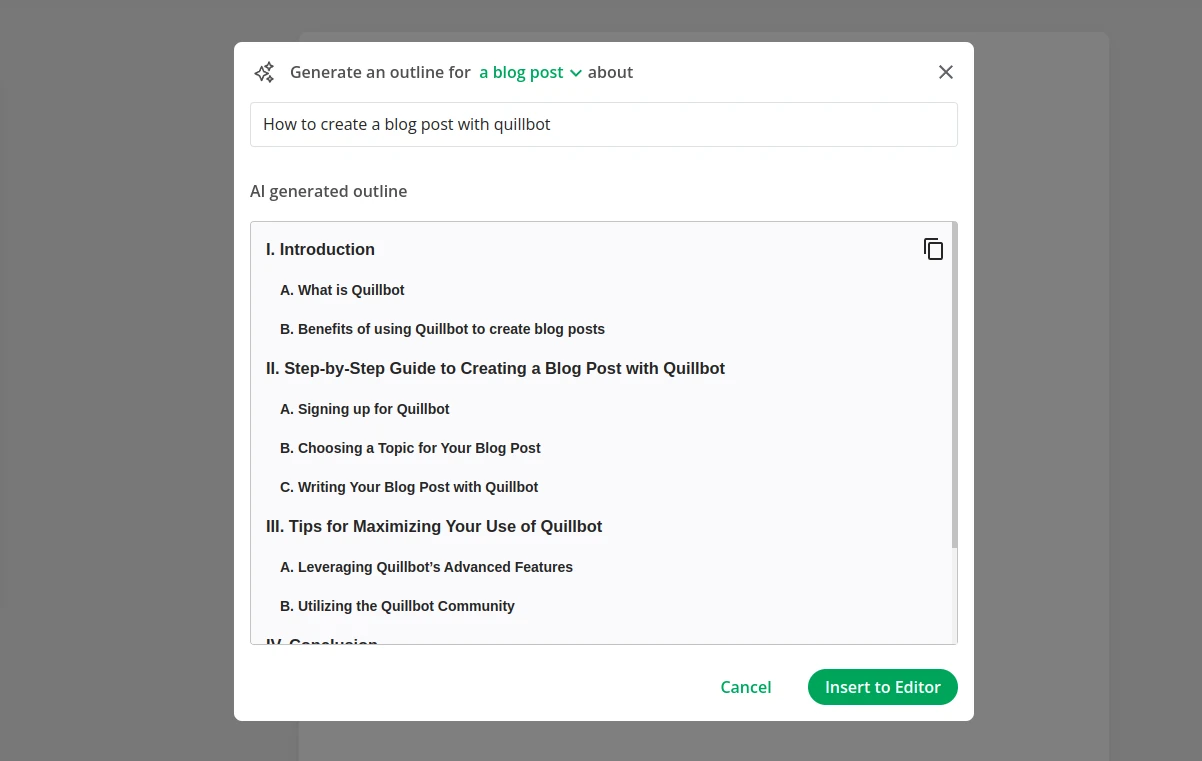
It will generate a sample blog outline for the given title. Click the “Insert to Editor” button to insert this outline. You can make some changes or use the outline as it is.
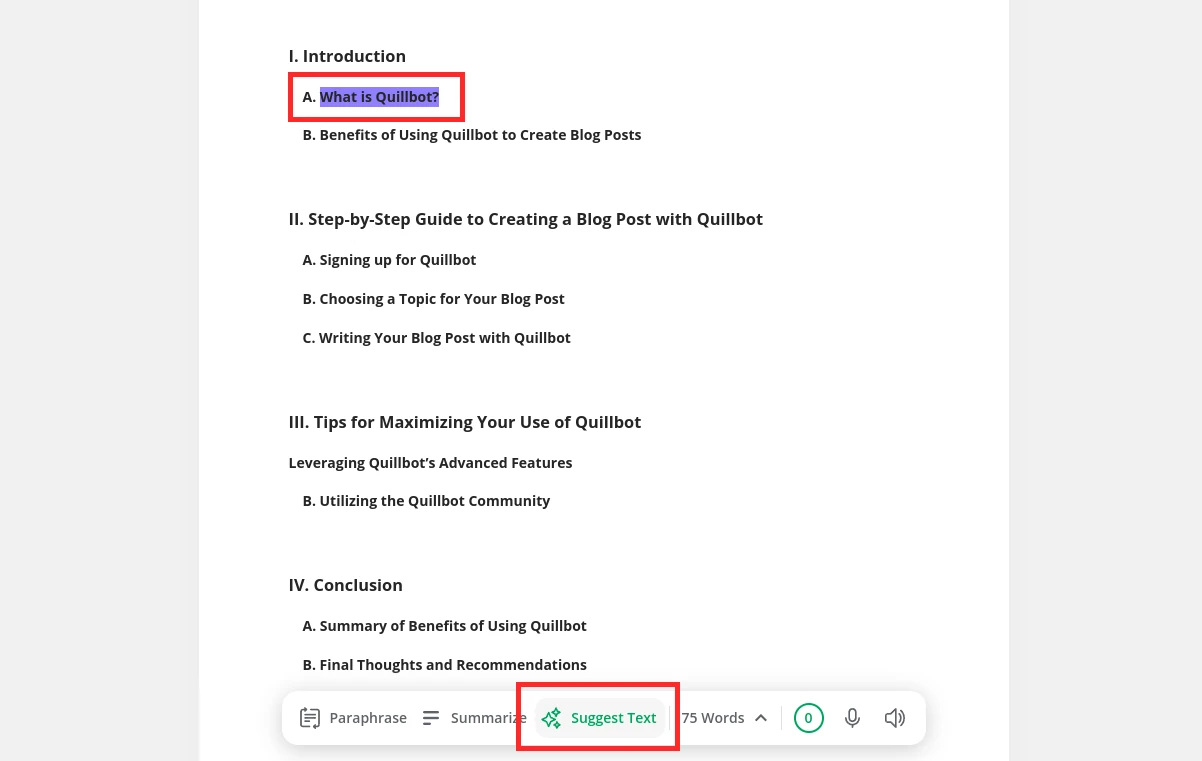
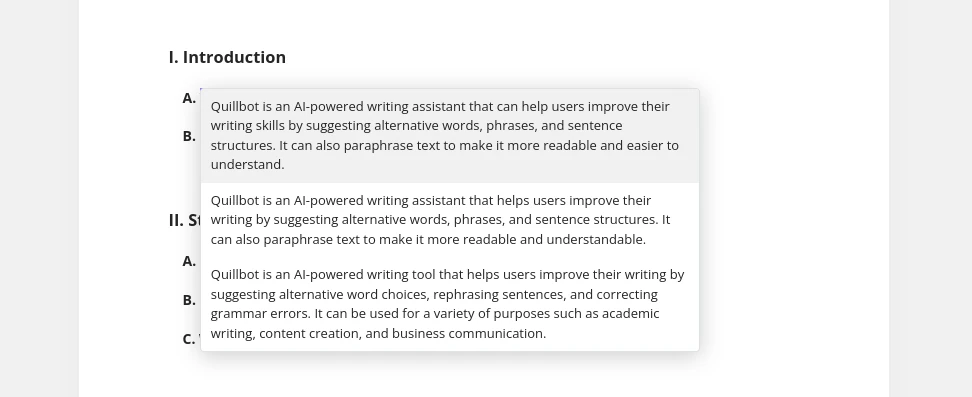
Now, highlight the first subtopic and click the “Suggest Text” button on the bottom. The QuillBot AI will generate some sample paragraphs for you.
You can choose one of the generated paragraphs. If you are not happy with any of the paragraphs, you can tweak the subtopic a little and try again.
After choosing a paragraph, you can either add more paragraphs to the same subtopic by providing a keyword related to that subtopic and suggesting text for that keyword or continue to the next subtopic and do the same.
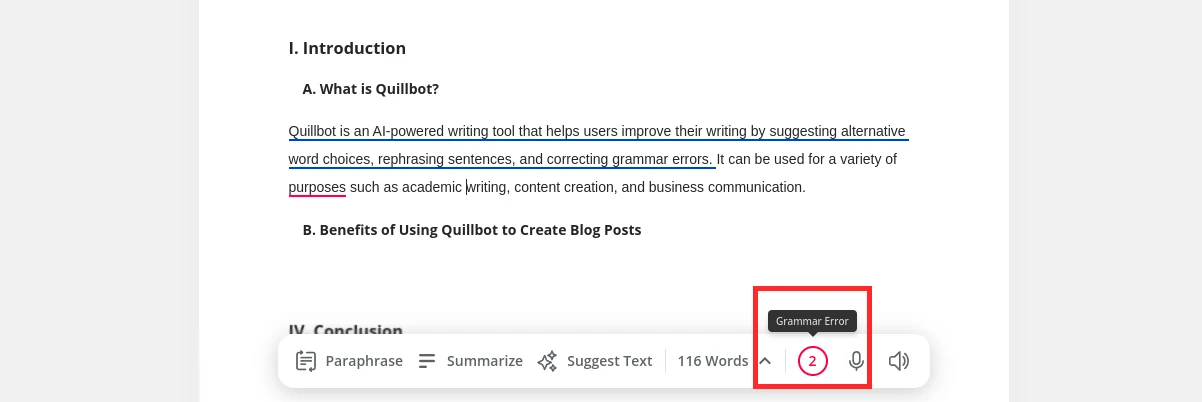
At any point, you can fix your grammar issues by clicking on the “Grammar Error” shown at the bottom tool bar.
You can highlight individual words and replace them with synonyms of those words.
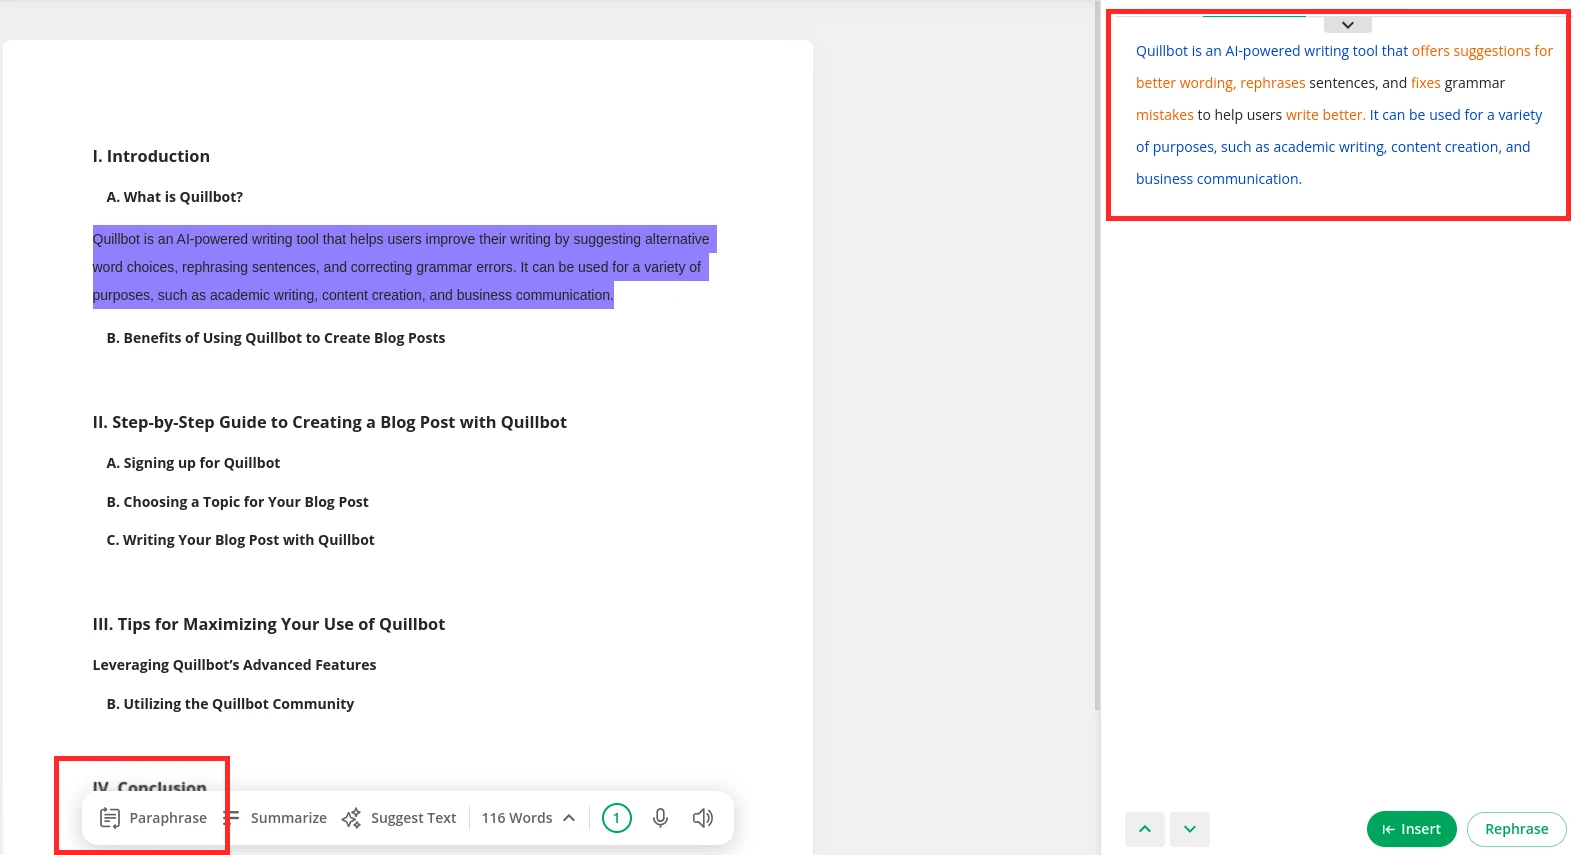
You can highlight your generated paragraphs and click on the “Paraphrase” button at the bottom to rephrase that paragraph.
Hit “Insert” to replace the existing paragraph with the rewritten paragraph.
QuillBot will even suggest changes if your paragraphs are too complex and can be simplified. But to get this feature, you need a QuillBot Premium subscription.
Once you have generated enough content for all the subtopics, go ahead and copy all the content. We will have to check the content for plagiarism. QuillBot Premium subscription
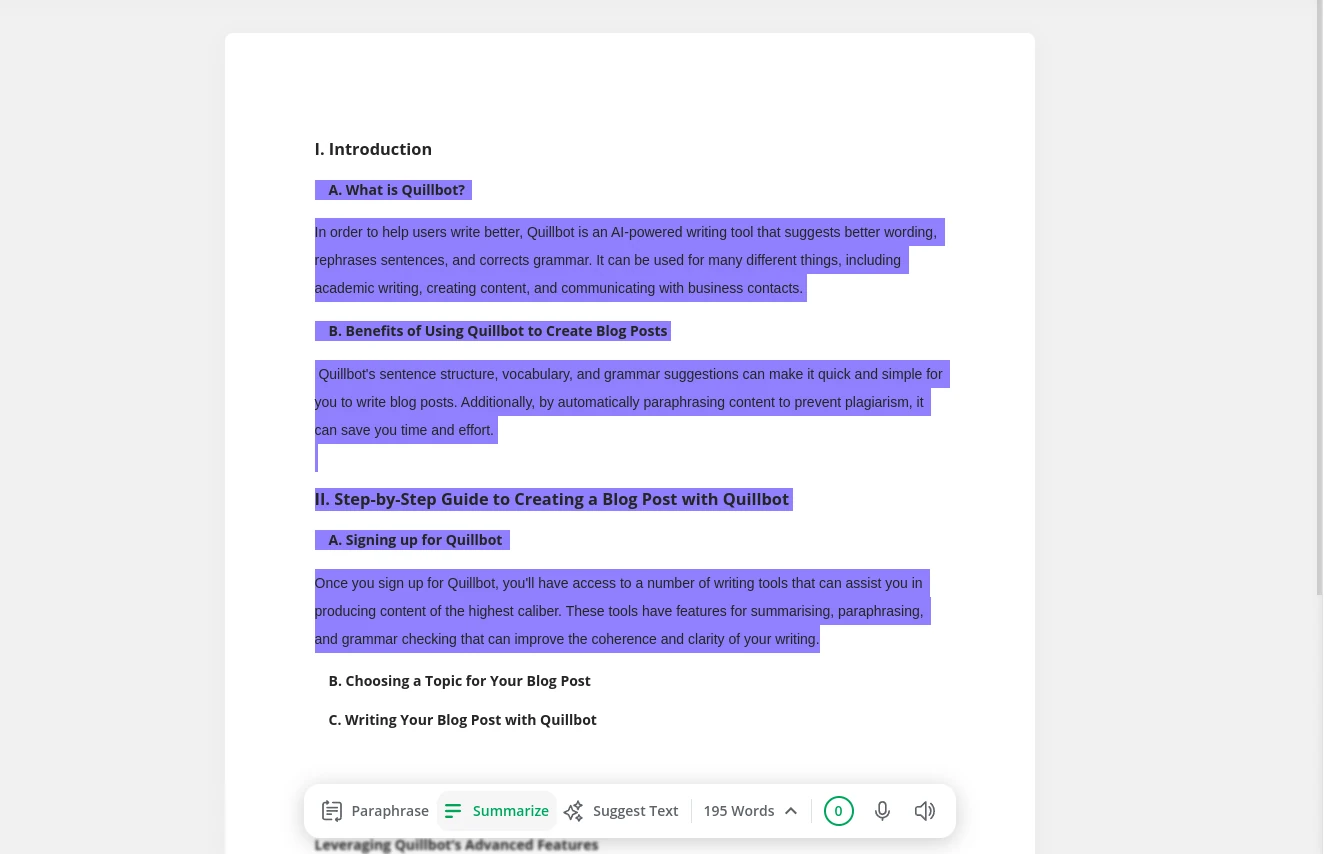
Before that, you can click on the “Summarize” button on the bottom tool bar to get a brief synopsis of the blog, which you can use for your Meta Description tag or as an excerpt for your blog.
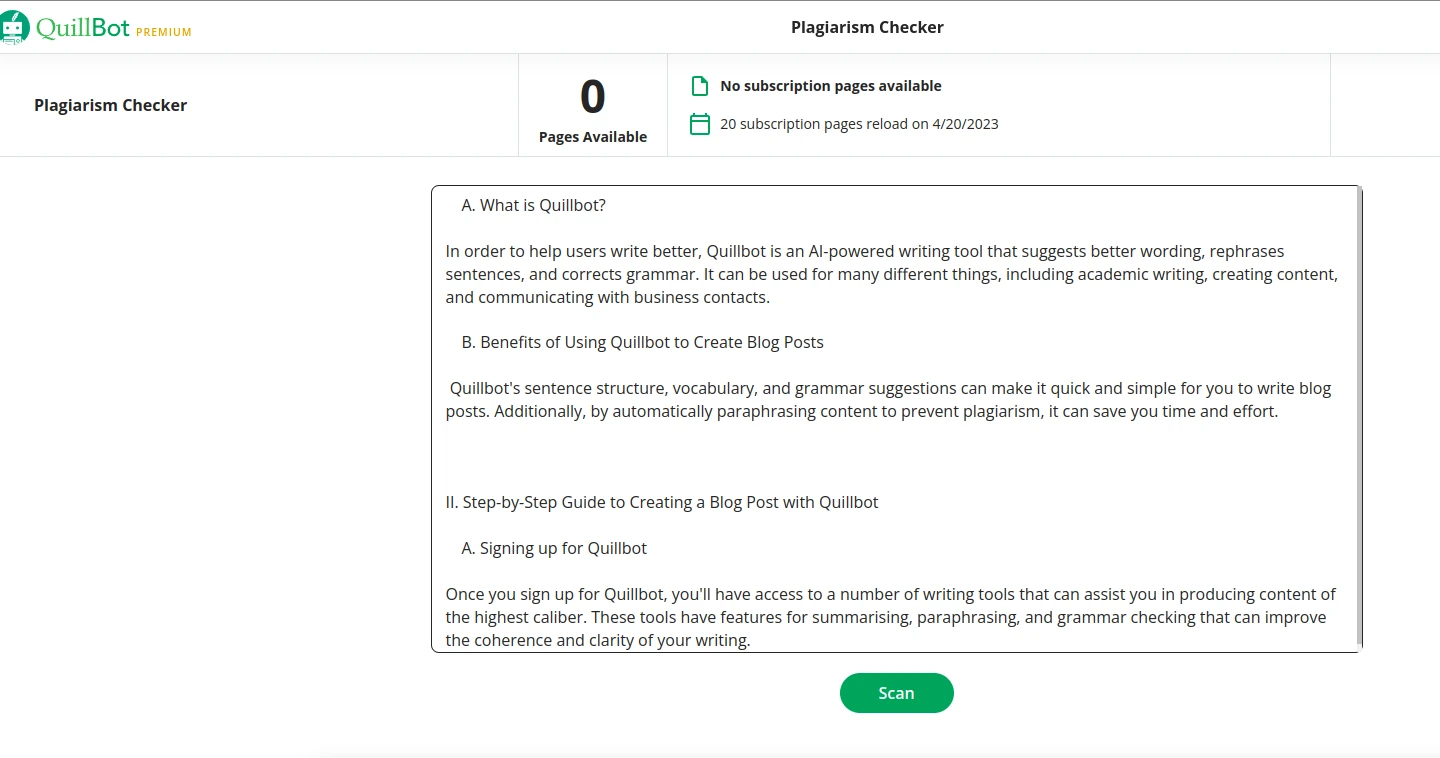
Go to QuillBot Plagiarism Checker and paste your content in the input field and hit the “Scan” button.
Your content will be analyzed, and you will be shown the matching percentage. The lower the percentage, the better.
Typically, less than 10% will be fine. You can go ahead and publish your article on your blog.
Try QuillBot Premium 3-Day Money-Back Guarantee

